Monday, November 21, 2011

Pumpkin Pie Doggie Treats

As a family, we refuse to give our dog table scraps. Although this is nice because she doesn't beg, it gives me an awful guilt complex. Every year on Thanksgiving we stuff our faces with food while my poor dog stares at us and licks her jowls. Every year, you see a little glimmer of hope in her eyes, and you know that it is her thinking that maybe, just maybe this one time she'll get to partake in some of the wondrous gluttony that is going on and alas, each year she is disappointed. 

Sure she gets treats every now and then, but they have to be few and far between (she has a bit of a weight problem and she's apparently grown sensitive to the allergens in the dog food) and plus, who wants the same ole' same ole'???


So this year I decided to look far and wide for EASY, healthy Thanksgiving treats for my Clover that I could make! I finally found a great recipe on squidoo.com!


Here are Clover's Pumpkin Pie Biscuits:
(Who knew pumpkin helps calm doggies' tummies too???)


You'll need:
1 1/2 cups of Whole Wheat Flour
2 cups of all-purpose flour
1/2 cup rolled oats
1 teaspoon of cinnamon
1/2 teaspoon of nutmeg
Mix of 1 cube of chicken bouillon and 1 cup water *(original recipe called for 1/2 cup broth instead)
3/4 cup of canned pumpkin (NOT pumpkin pie mix)
1 tablespoon oil
1 tablespoon maple syrup or pancake syrup
1 egg
Non-Stick Foil


1. Preheat oven to 350 degrees.
2. Mix the dry ingredients in a large mixing bowl.
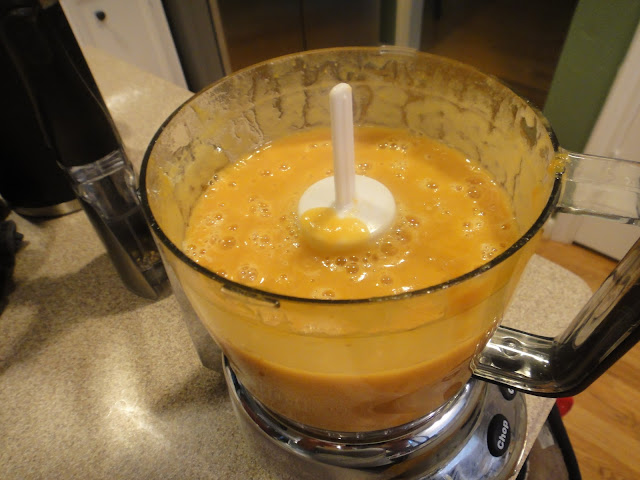
3. Blend the broth, pumpkin, oil, syrup and egg in a blender or food processor.


4. Add the blended mixture to the dry ingredients and mix together with a spoon.
5. Use your hand to mix well and form a dough. You'll have to REALLY work it!


6. Here is where I did my own thing to help with clean up. 

      (a) Put the dough onto saran wrap.
                                                   
    (b) Put another piece of wrap on top to prevent sticking to the rolling pin. Roll out to 1/2 inch thickness. You will actually roll on top of the saran wrap.
           
       (c) Pick up saran wrap and throw away with no left-over mess!
                  
       No extra flour to keep sprinkling on....AND look at how clean my rolling pin is!! :)

7. Use cookie cutters to cut out the biscuits and place on a baking sheet with non-stick foil.


OPTIONAL STEP  - At this point, I took a fork and poked four little center holes in the middle of each biscuit just for looks.

8. Bake for 30 to 40 minutes or until brown.


9. Store biscuits in the refrigerator in an air-tight container. 
I decided to give some of our other doggie friends the same treat, so I made these cute baggies for Clover to give them on Thursday. I put 4-5 biscuits in each Ziploc sandwich bag and added the topper! You can download the bag topper I made here


This recipe made around 25 biscuits. The wheat flour makes these a little chewy, Clover was the first to volunteer of course, and she loved them! 

Thursday, November 17, 2011

Simple Thanksgiving Centerpiece

Okay, since we are forbidden to put up Christmas decorations before Thanksgiving at our house, I haven't been able to do my little Christmas project yet with those pinecones we picked a couple weeks ago. (Not to mention that the warm weather we've had recently hasn't really helped spread the Christmas spirit much either.)

So I wanted to do something with the pinecones, so I put together a real quick, simple Thanksgiving centerpiece.

I just threw some acorns in the bottom of the glass pillars and then threw the pinecones on top. It's not much, but I think simplicity goes a long way. And plus, it's a great holding place until I'm ready to reuse them for Christmas!
It looks festive and literally took a couple minutes to accomplish...which on some days, a couple minutes is all I have!

Saturday, November 12, 2011

Open-faced Breakfast Sandwich

Good Morning! If you're like me, you value sleep. A LOT. I usually like to sleep until I absolutely have to get up. So getting up early to cook a complicated breakfast is out of the question for me. So this was quick and easy for breakfast...my OPEN-FACED BREAKFAST SANDWICH.


First I just grilled some sourdough bread. While that was browning, I poured out some Egg Beaters egg whites into a pan.

Then I threw a piece of low fat cheddar cheese on top of the bread while it was still hot and in the pan so it could melt a bit.
I put the egg whites on top and topped with some Raspberry Chipotle Sauce.

And you could throw whatever else you wanted on top...I'm thinking a couple strips of VEGGIE BACON would be great! (Although I'm sure I stand with the few in agreeing with anything having veggie bacon in it, but trust me, if you haven't tried it, don't knock it. It's really good. In fact, with veggie bacon, I don't even miss the real stuff anymore!)

Wednesday, November 9, 2011

Pickin' Pinecones

I'm so happy November is here, but you as well as I know that November flies by without even a second belch after Thanksgiving. Now, I LOVE Christmas, but I also would like to savor all November and its holiday has to offer. It's practically Christmas...as much as I hate to think so.  So I started thinking I needed to be proactive and at least start thinking about Christmas decor. So with a project idea in mind, C & I went out on a mission...pinecone pickin'.

Now pinecone picking is super easy because well, this time of year, they are already "picked" for you. We grabbed only a backpack to put the pinecones in and set out. (Well, I don't have to have to mention that of course the backpack also held diapers, wipes, snacks, milk, extra clothes, his lovey and more, do I??? And keep in mind we only traveled a mile away from our house!)

 As we were going along on our nature walk, we'd stop and look at the pinecones.

 Some were too broken, and others were just right!

 We found some pretty good pinecones that would be great for the project!

 We had a great time pinecone pickin' and my sweet son had a blast helping out in my project! Stayed tuned for how my project turns out!

Tuesday, November 8, 2011

Jalapeno Popper Grilled Cheese

Sadly when I became pregnant with Clark, I had too few food aversions and too many food cravings. And sadly still, one of those cravings still has not left - JALAPENOS! So when I saw this on pinterest, I HAD to try it!
I read the original recipe off bsinthekitchen.com and just tweaked it a bit to fit me.

Jalapeno Popper Grilled Cheese Sandwich
For 2 sandwiches:
6 large jalapenos
2 tbsp cream cheese
1 tbsp ranch dressing
3 tbsp chopped chives
1 tbsp sun-dried tomatoes (julienne cut)
8 slices of cheese (I used 4 cheddar and 4 colby jack)
Butter
4 slices of sourdough bread


1. I always start by getting the butter out of the refrigerator first so that way, when I'm ready to spread it on the bread, it'll be nice and soft.

2. Go ahead and roast the jalapenos. I am by no means an expert on roasting jalapenos. I really had no idea what I was doing, so I'm determine to perfect this and try again on another day!
I just sprayed a pan with some PAM and roasted for about 15 minutes on medium heat.
(Okay, so I didn't really roast them, but I made do...)

After this, you're supposed to put the jalapenos in a paper bag to "steam" so you can easily pull the skins off. Well, I was pressed for time, so I skipped this step and left the skins on....again, I'll try again later.

3. While the jalapenos were roasting, I combined the cream cheese, chives, ranch, & tomatoes.


4. Cut the jalapenos in half and remove the seeds and spines.

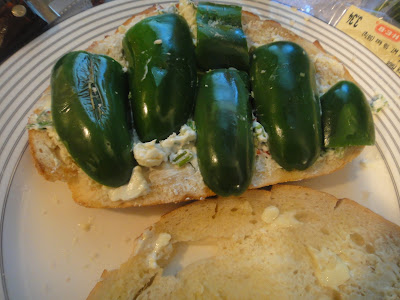
5. On one slice of bread, spread the cream cheese mixture and lay out your jalapenos.

6. Then top with cheese. I used 2 slices of colby jack and 2 slices of cheddar.

7. Generously butter the outside of the sandwich and heat in panini grill at 375 degrees. If you don't have a panini grill, you can grill in a pan on medium heat until golden brown.


 Serve with a beer (or two) and enjoy! It was VERY good and next time I will try to REALLY roast the jalapenos AND take the skins off, but even pressed for time without doing those things, this was a yummy yummy lunch!

Monday, November 7, 2011

Sausage Bread (VEGETARIAN version!!)

You have no idea how excited I am about this. Being a vegetarian, I am always looking for new recipes that I can cook, whether they are strictly veggies or something that I can swap the meat out for tofu or soy. But really that part is easy; it's the characteristic of TASTING GOOD that is the tricky part.

I am lucky enough to have my cooperative husband. Me being a devout veg-head and my husband being a hungry hunter, doesn't always make the decision of what's for dinner that easy. He is very good about trying my meat substituted meals with a smile. (Although the line between a smile and a stomach pained grimace is very fine.) And my poor son doesn't know any better (nor have a choice).

So I totally stole my friend Susie's sausage bread recipe and did the ole' switcheroo!
Note: For all you meat lovers out there, you can see her original yummy recipe with the ACTUAL sausage on her blog at www.thedomesticdarlin.com

I will use "sausage" in quotes to refer to my meat-free sausage throughout this post so as not to offend any meat lovers.  ;)

Vegetarian "Sausage" Bread

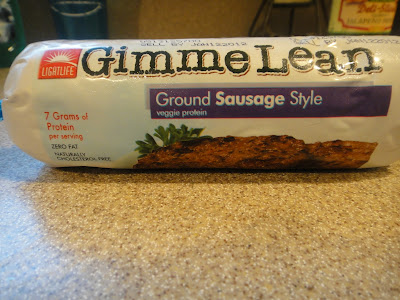
-1 package of Gimme Lean -Ground Sausage style
-1/2 cup green onions 
-1/2 cup parmesan cheese 
-1/2 cup Swiss cheese
-1/4 cup canned jalapenos (optional)
-1 tsp salt 
-2/3 cup milk
-2 1/2 cup HeartSmart Bisquick mix 
-1 tsp butter (melted)


1. Preheat oven to 450 degrees. Spray PAM on a pan and brown the sausage and onions together.

 The sausage will be in very large clumps at first, so as you are browning, chop the "sausage" up using your spatula, spoon, etc.

(As you can see, the "sausage" clumps are getting smaller and smaller)


And it's done!

2. Put the "sausage" in a bowl and mix in all the other ingredients.

3. I rolled mine into balls (only because that is what Susie did. When I steal, I steal.) but she says you can put into muffin tins or loaf pans.


4. I popped these in and waited 18 minutes and I was done! (I have a convectional oven so these took 18 minutes.. If you have a regular oven, I would do the full 20 minutes.)


These turned out great! They were great for my husband to take on the way out the door for work while I got to sit down and enjoy the fresh baked bread. Not to mention the sausage...oops, excuse me, the "sausage" has 7 grams of protein per serving and ZERO fat! Now, there's a guilt free breakfast! :)

Friday, November 4, 2011

"I love.....READING!"

As a reading specialist, I'm always looking for ways to develop early literacy skills. I guess you can take the girl out of the school, but you can't take the school out of the girl!
Now don't get me wrong, I LOVE being a SAHM, but I certainly miss teaching. My poor child, family's children, and friends' kids...all they'll want is a no brainier toy and I'll be the one smiling handing them an encyclopedia! (Do they even still make those???)

My sweet nephew turned 2 this past month and I was in a stupor as of what hip fun toy to get a 2 year old boy. Then I stumbled upon www.pintsizeproductions.com. BINGO!

I was able to make a personalized repetition board book complete with my own pictures! (Ummmm, awesome isn't a good enough word to describe how this made me feel, so let's go with stupendous actually) Basically, a repetition (or repetion of phrase) book is where the order of the words is repeated making the reading very predictable and therefore easy to read. And even furthermore FUN to read!

So I made a book titled Things Daniel Loves (Daniel will be his alias) and for each page I put a picture of him with one of his favorite things with the sentence reading "I love ________"
This was done for each page and each page had a different thing/activity with its coordinating picture. I just uploaded the photos I wanted and typed in exactly what I wanted it to say.

The company was great-I had never heard of them before so I was taking a shot in the dark, you know...ordering and making it on-line (and crossing my fingers I wouldn't end up in People's Court suing them for payment of a never delivered purchase or getting someone else's book titled "My Favorite Psycho Things to Do") but it was super easy and super fun to make! They have different options to choose from and I got my order within at least a week from ordering it!

It was a big hit, and he is having a blast reading it!
God, don't you just love developing literate minds??? It's pure..........stupendousness!

Thursday, November 3, 2011

Simplicity is always better

Simplicity is always better (or in my case it should read "The Lazy Way is always OKAY!")! So we needed to do some calcium clean-ups around our bathrooms at our house, but I wasn't about to unscrew every shower head, disassemble, then reassemble, and then finally figure out that I reassembled it wrong. So instead of taking the shower head to the vinegar to soak, I decided to take the vinegar to the shower head!


So as you can see from the pictures, all I did was fill a Ziploc bag with vinegar and dunk the shower head in the bag (making sure that the head was completely submerged) and tied it up using a rubberband. I did each shower head one at a time letting each one soak for several hours.

It worked great and it was so easy, there was no need for me to use the shower because I didn't even break a sweat! ;)

Wednesday, November 2, 2011

With or Without Pickles?

That's the big question for today. Yup! November 2nd is National Deviled Egg Day! I personally like them both ways. To celebrate this day, I thought I'd make some deviled eggs to have with lunch! Since we don't have any pickles, I guess that answered the question for me!

These don't last very long in our house...
I make my deviled eggs using the Williams-Sonoma recipe. All you need is:
4 eggs, 2 TB mayo, 1/2 teaspoon Dijon mustard, & 8 small pinches of paprika.

1) Boil eggs ( around15 min), cut, & scoop yolks out.
    Here is a good place to point out my awesome Egg Perfect Egg Timer! I LOVE IT! I just throw in the egg timer along with the eggs in the pot and it changes color as the boiling eggs move from raw to soft, medium or hard boiled! It automatically adjusts to the number of eggs and the level of water in the pot, so you can never go wrong with it! I got it at Williams-Sonoma. I HIGHLY recommend it!

Looks like my eggs are done!

2) Add mayo and mustard with yolks and mash into a paste.
3) Taste and season with salt and pepper.
4) Spoon mixture back into each egg white half and sprinkle paprika on top.

optional: add 1 TB finely chopped sweet pickle to egg yolk and omit paprika

If the eggs fall apart, just chop them up and make egg salad instead and serve on a croissant! Super yummy!

Just another reason to celebrate!

Tuesday, November 1, 2011

Whole Wheat Yumminess!

   I've never really worked with whole wheat flour before so I thought I'd take a crack at it and make some nutritious whole wheat pancakes for breakfast. Since it is much heavier than white flour, I've heard that using whole wheat flour can end up with disastrous results...hence my hesitation before now.
   I found out that a good rule of thumb is to mix the whole wheat flour with an appropriate amount of white flour when baking. So that is what I did to make the following breakfast:

3/4 cup all-purpose flour
3/4 cup whole wheat flour (I added an ounce or 2 more wheat flour than the white)
3 tablespoons sugar
1 1/2 teaspoon baking powder
1 1/2 teaspoon baking soda
1/2 teaspoon salt
1 1/2 cup milk
1 Tablespoon vegetable oil
1 large whole egg (yolk and egg white)

   Combine both flours in a large bowl along with the sugar, baking powder & soda, and salt. Stir with a whisk.
   In a smaller bowl, whisk together the milk, oil and egg. Add the wet mixture to the flour mixture stirring until moist.

   Spray skillet or griddle with PAM and heat over medium.
   I spoon about 1/4 cup of the batter onto the skillet. Then flip over when the pancakes start to bubble.
Serve with butter and syrup (optional) and you are done! It was so easy that I was able to do this and brew coffee at the same time...not always an easy task for me at 6 in the morning. Here's to healthier eating! 
   Oh, and I will say that YES, they did taste "HEALTHIER" if healthier has a taste, but they were still yummy and my picky eater son gobbled them up...along with my husband!

Beer Punch

I hope everyone had a happy Halloween! We had a great time Trick or Treating and passing out candy!
We did the Wizard of Oz theme this year and we had our own Cowardly Lion!
While the kiddos got some candy, the adults had an adult beverage of their own! We went over to my neighbor's and it was my first time for Beer Punch. It was so good, I thought I'd share the recipe! It's super easy.

1 large can pink lemonade
3 beers (we used Bud Lite Lime)
3/4 cup vodka

Mix well until lemonade is dissolved. Serve over ice.

Let the fun begin!